Windows Server Update Services (WSUS)
To create a new named connection to the Windows Server Update Services (WSUS) distribution system, perform the following steps:
-
On Settings menu, click Distribution Systems in the left pane.
The Distribution Systems pane appears.
-
Click Add New.
-
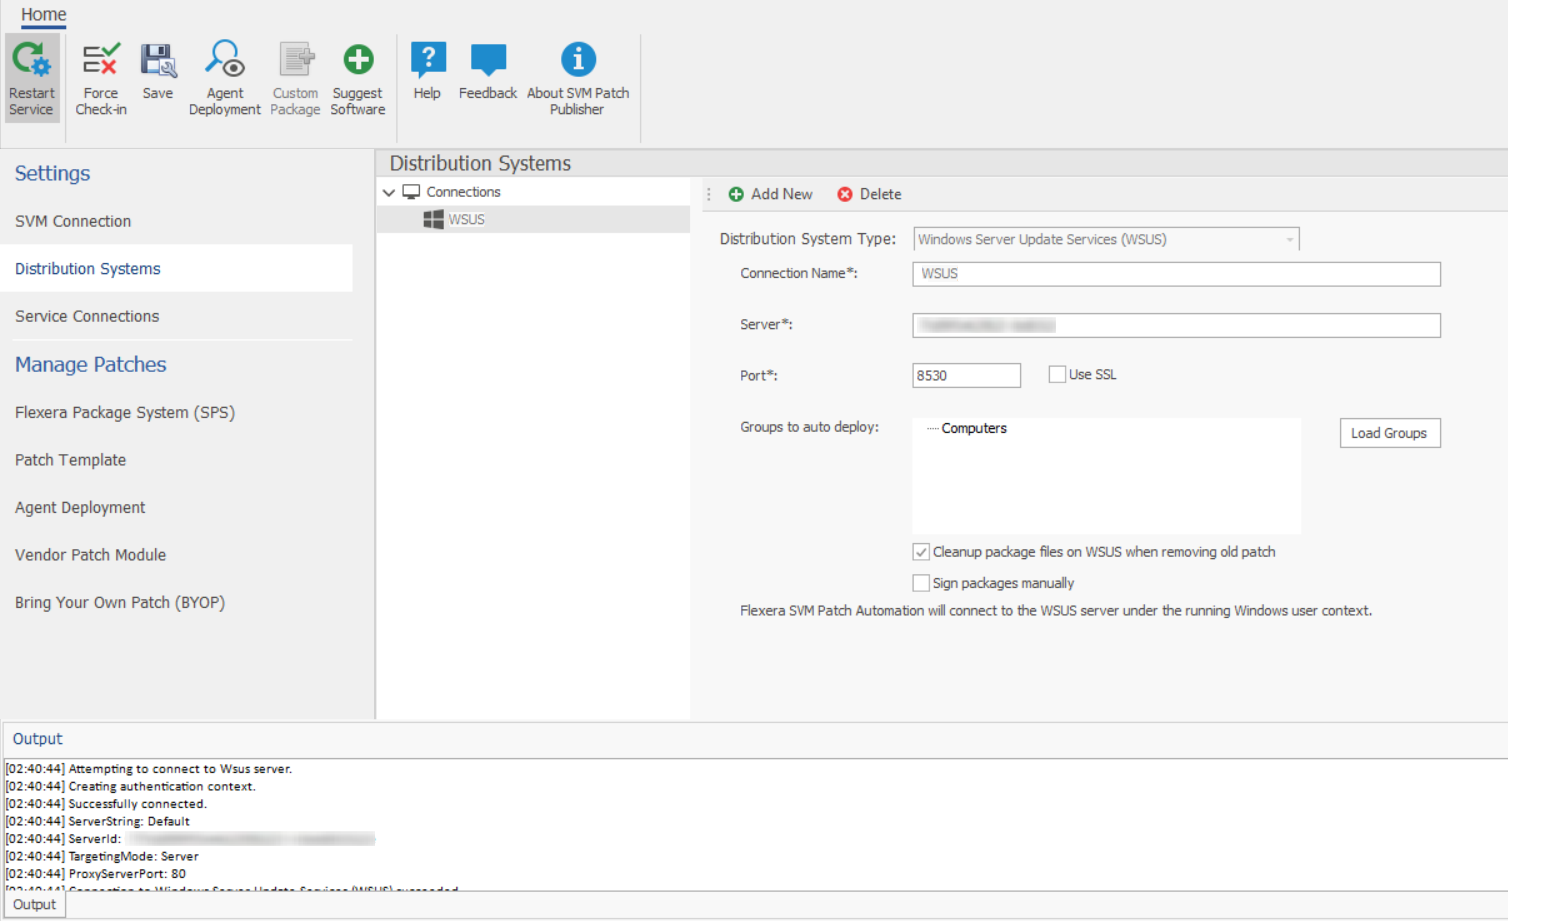
Use the following fields to add the WSUS connection:
Field/Button Description Distribution System Type Click the Distribution System Type drop down and select Windows Server Update Services (WSUS) from the list. Connection Name Enter the connection name. Server Enter the server details. Port Enter the port number. Use SSL Select the Use SSL check box only if your WSUS is configured to accept SSL connections. Load Groups By clicking the Load Groups button, a list of computer groups will appear in the Group to auto deploy field. Groups to auto deploy Displays a list of computer groups configured in WSUS Server. Select the computer groups which you wanted to deploy the packages.
Note: Only displayed when Load Groups button is clicked.Cleanup packages files on WSUS when removing old patch If you enable, old package will be removed during the publish. By default this option will be unchecked. Sign packages manually Select Sign package manually check box for external package signing. -
Click Test & Save Connection to ensure settings are correct. The Patch Publisher service restarts automatically. You will receive a success message in the Output Window.
-
On successful connection, the WSUS Distribution System is added.
-
Restart the SVM Patch Publisher so selected groups are assigned for endpoint deployments.
Related topics: