VMWare Workspace ONE
To create a new named connection to the VMWare Workspace ONE distribution system, perform the following steps:
-
On Settings menu, click Distribution Systems in the left pane.
The Distribution Systems pane appears.
-
Click Add New.
-
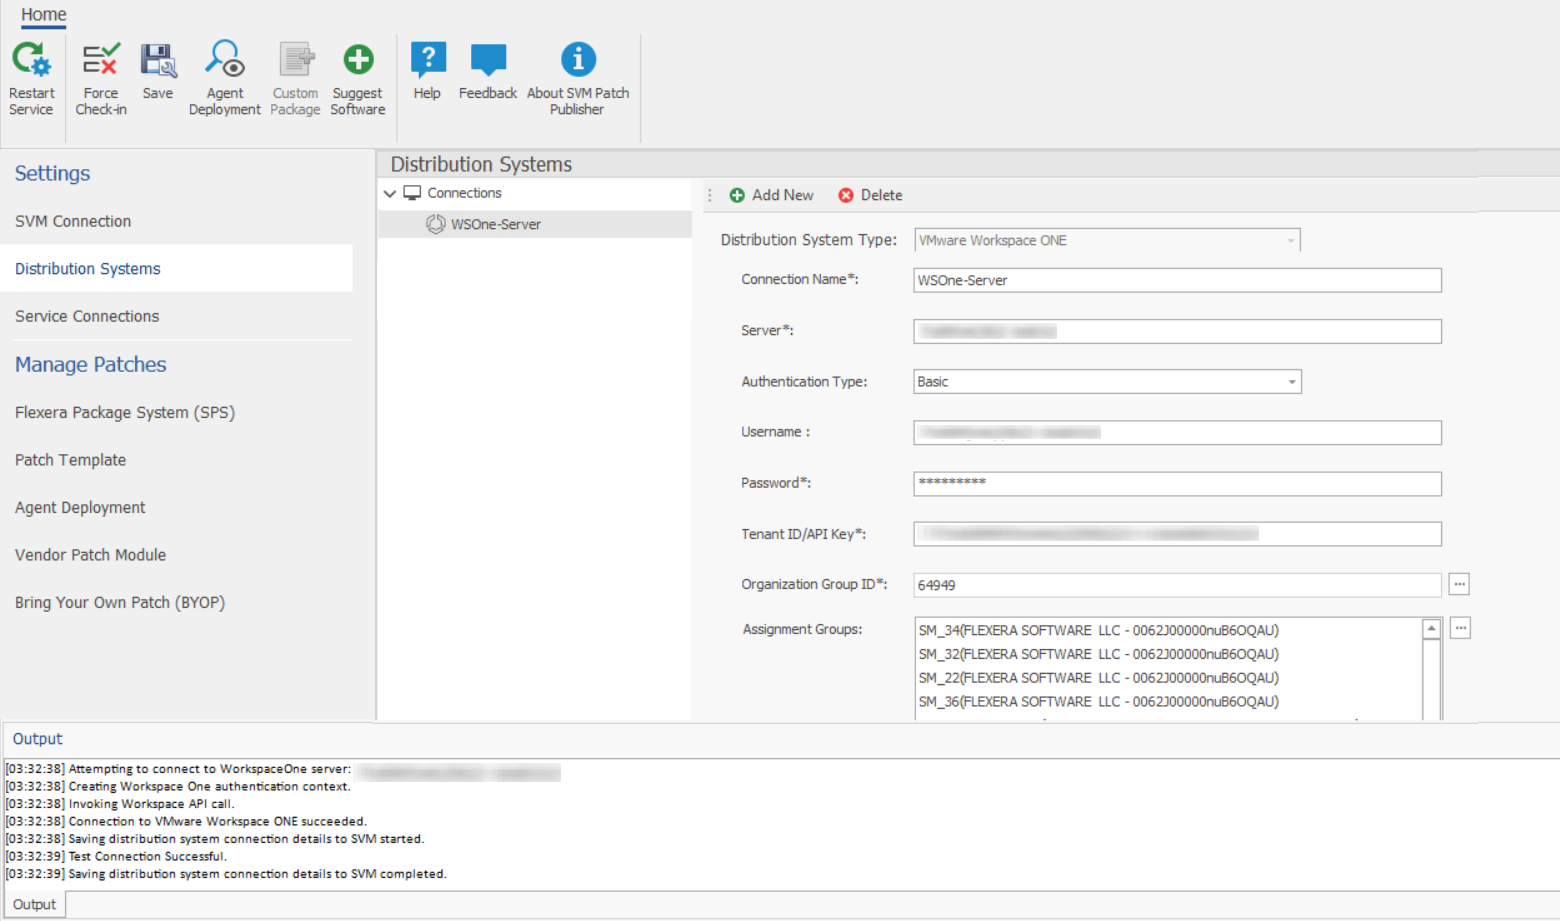
Use the following fields to add the VMWare Workspace ONE connection:
Field Description Distribution System Type Click the Distribution System Type drop down and select VMWare Workspace ONE from the list. Connection Name Enter connection name. Server Enter the server details. Authentication Type Select one of the authentication type: - Basic - If you select this authentication type, then enter the valid credentials of the VMWare Workspace ONE.
- Certificate - If you select this option, you can select the registered certificate.
Thumbprint Choose required certification for the authentication.
Note: This field appears only when you select Authentication Type as Certificate.Tenant ID/API Key Enter the registered tenant id. For more information, see Create Tenant ID / API Key. Organization Group ID Choose the required organization group ID. Assignment Groups Choose a group or multiple groups and make assignments for end point deployments. For more details, see VMWare Workspace ONE Assignment Groups. Hide Notification By default, this option remains unselected. - If selected, notifications will be hidden, reducing unnecessary alerts for the selected Workspace ONE patches.
- If unselected, users will continue to receive notifications related to the selected Workspace ONE patches.
-
Click Test & Save Connection to ensure settings are correct. The Patch Publisher service restarts automatically. You will receive a success message in the Output Window.
-
On successful connection, the VMWare Workspace ONE Distribution System is added.
-
Click Restart Service ribbon for the change to take effect.
Related topics:
VMWare Workspace ONE Assignment Groups
To make assignments for end point deployments in the SVM Patch Publisher for Workspace ONE publishing:
-
In Assignment Groups (optional) field, click context menu icon. The Workspace ONE Smart Group window appears. Select the desired groups from the list and then click Ok.
noteMake sure that the Assignment Groups are selected before restating the service.
-
Click Restart Service ribbon for the change to take effect.
-
The selected groups will be assigned for the end point deployments.